> For the complete documentation index, see [llms.txt](https://falcon-game-studio.gitbook.io/falcon-sdk/llms.txt). Markdown versions of documentation pages are available by appending `.md` to page URLs; this page is available as [Markdown](https://falcon-game-studio.gitbook.io/falcon-sdk/falcon-core/2.-remoteconfig-and-ab-testing/b.-abtesting-and-remoteconfig-example.md).
# b. AbTesting & RemoteConfig Example
### b.1. Requirements set forth in the example:
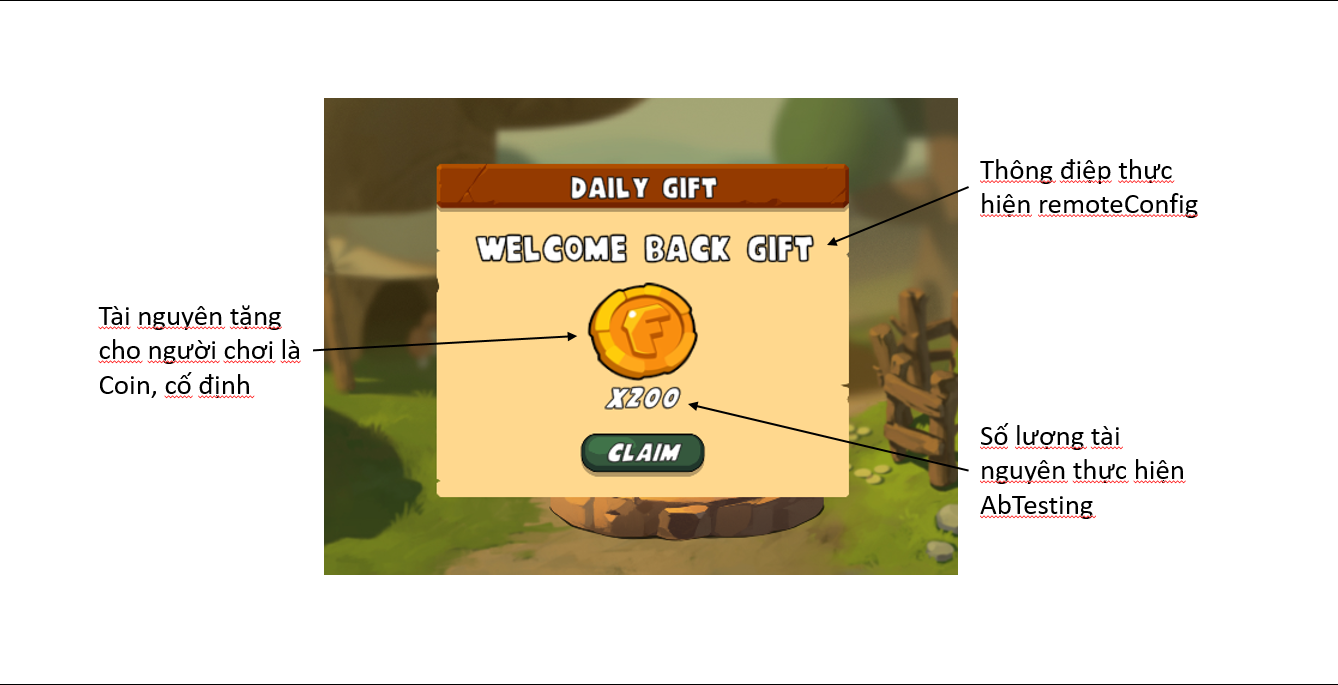
* When players enter the game, we will give daily gifts to players, which is a certain amount of resources. In this example, the gift would be coins, the most basic currency in the game.
* The amount of resources awarded to players will be abTesting on 60% of new players with 2 cases:
* Half will be given 50 coins.
* Half will be given 100 coins.
* In the gift message to the player, the message in that message will be implemented remoteConfig so that it can be changed when the need arises.
### b.2. Implement the UI part
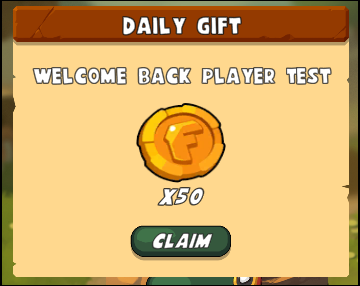
* We create a panel in the canvas as follows:
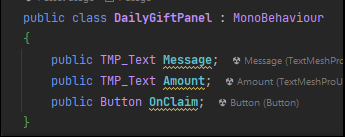
* We create a class containing the elements corresponding to the panel:
Where:
* Message: The message implements remoteConfig.
* Amount: the number of resources donated in the daily gift performed abTesting, visible to the user.
* OnClaim: the player button confirms the receipt of the daily gift.
### b.3. Perform AbTesting and RemoteConfig code generation
* Step 1: We create the FalconConfig inheritance code, declaring the values you want to use, where:
* `DailyGiftAmount`: the amount of resources donated to players according to dailyGift (default value is 50).
* `NotifyMessage`: gift message, the default value is ("Welcome Back Gift").
```
public class AbTestingConfig : FalconConfig
{
public int DailyGiftAmount = 50;
public string NotifyMessage = "Welcome Back Gift";
}
```
* Step 2: We create AbTesting code to perform the DailyGiftPanel call.
```
public class AbTestingScript : MonoBehaviour
{
private static bool Popped = false;
[SerializeField] private DailyGiftPanel dailyGiftPanel;
private IEnumerator Start()
{
//Snooze dailyGiftPanel when it is not finished
dailyGiftPanel.gameObject.SetActive(false);
// Wait for SDK init
while (!FalconMain.InitComplete) yield return null;
//Check that the daily gift popup is only made once per day
//The value of RetentionCounter.RetentionChanged will show whether this is
//the player's first login of the day does not, this value is
//provided by SDK, see FalconAnalytics/Automatic log for details
if (!Popped && RetentionCounter.RetentionChanged)
{
Popped = true;
//Show dailyGiftPanel
dailyGiftPanel.gameObject.SetActive(true);
//Adjust values based on configs
dailyGiftPanel.Amount.text =
"x" + FalconConfig.Instance().DailyGiftAmount;
dailyGiftPanel.Message.text =
FalconConfig.Instance().NotifyMessage;
dailyGiftPanel.OnClaim.onClick.AddListener(() =>
{
//Adjust player resource and hide panel when the user confirm
GameDataHandler.Instance.IncreaseCoin(
FalconConfig.Instance().DailyGiftAmount,
"DailyGift");
dailyGiftPanel.gameObject.SetActive(false);
});
}
}
}
```
### b.4. Declare Config on the server
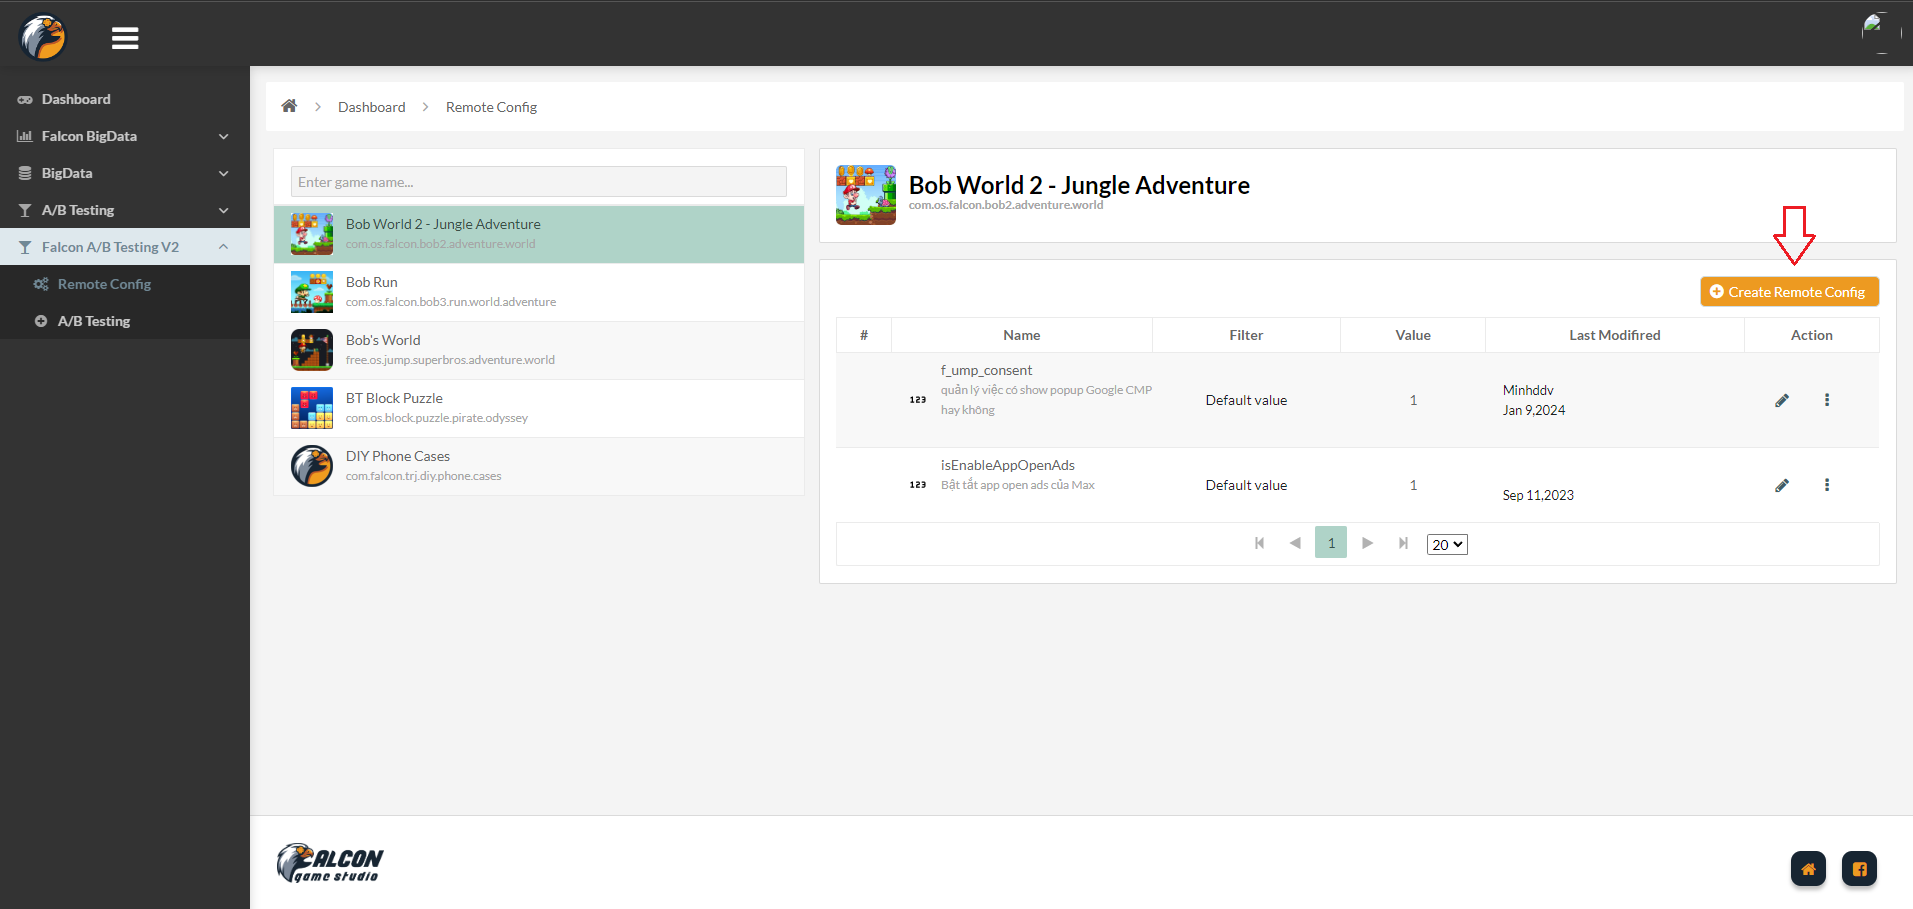
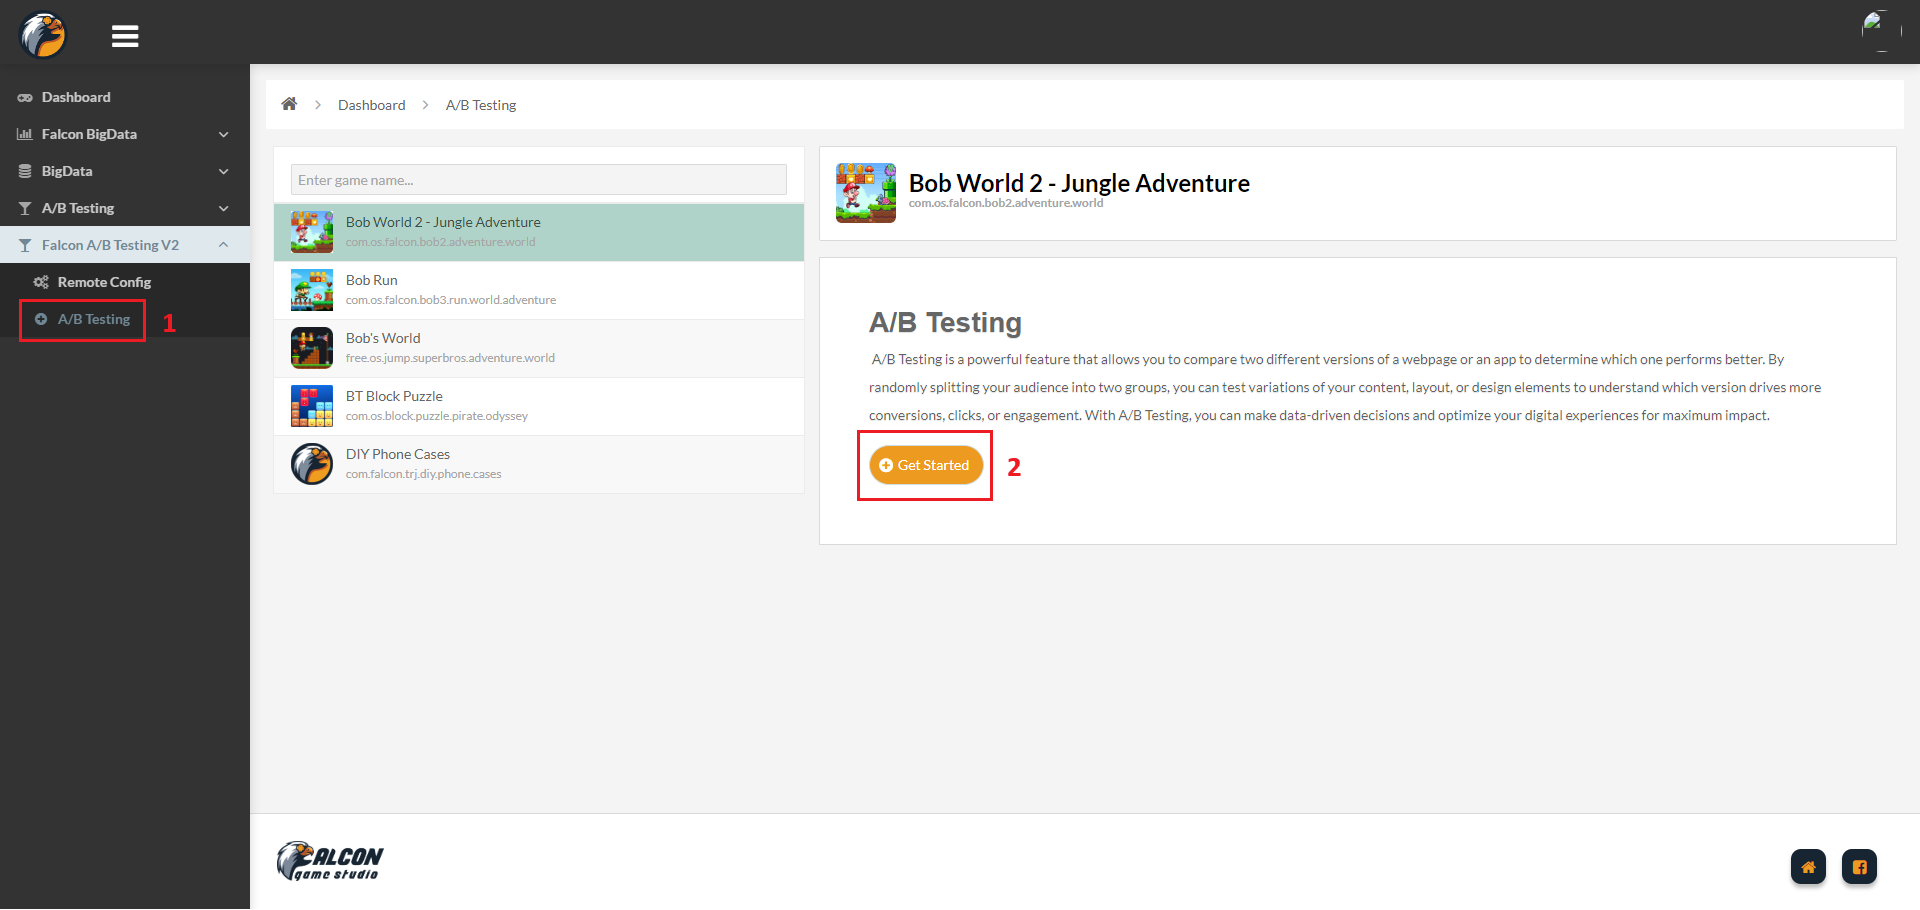
* Step 1: Access , find the correct name of the game you want to create a config for.
* Step 2: Click Create Remote Config button.
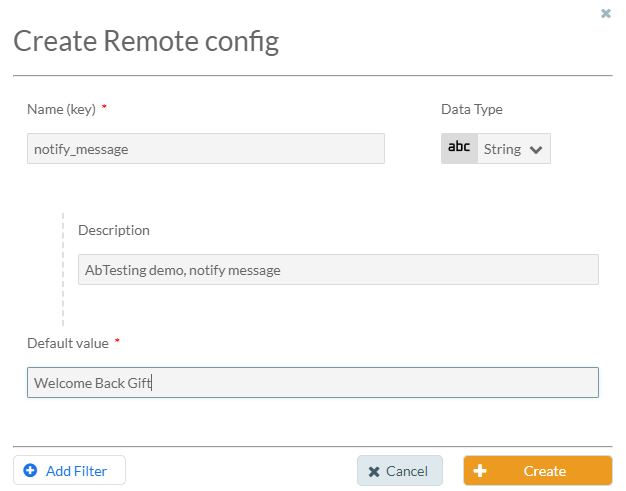
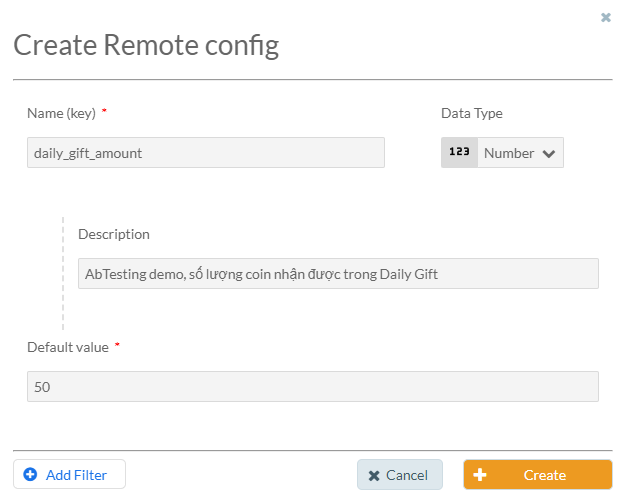
Step 3: Create a Remote Config for NotifyMessage (Enter the name, select the data type, enter the description and default value)
Step 4: Create a Remote Config for Daily Gift Amount.
Here the configs have been recorded by the system as remote config, the value of the config has been adjusted according to the server on 100% of users according to filters.
The local values have now been updated according to the remote config values on the server.
### b.5. Create an A/B Testing Campaign
In the next steps, we will create abTesting on the DailyGiftAmount variable, performing abTesting on 60% of new players.
* Step 1: Create an A/B Testing campaign on data4game.
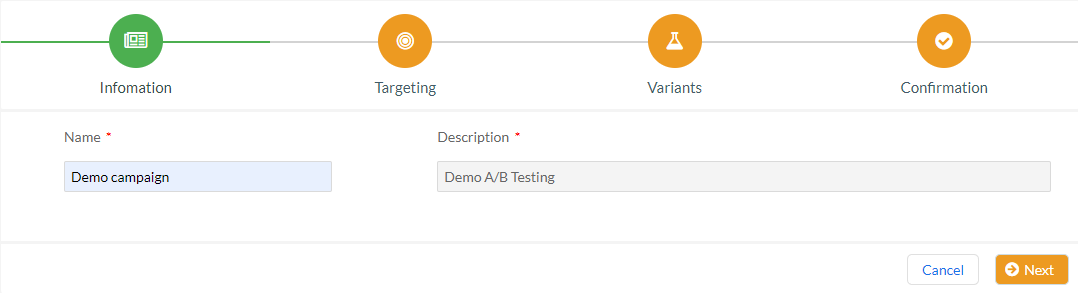
* Step 2: Fill in the Name and Description of the campaign and then click Next.
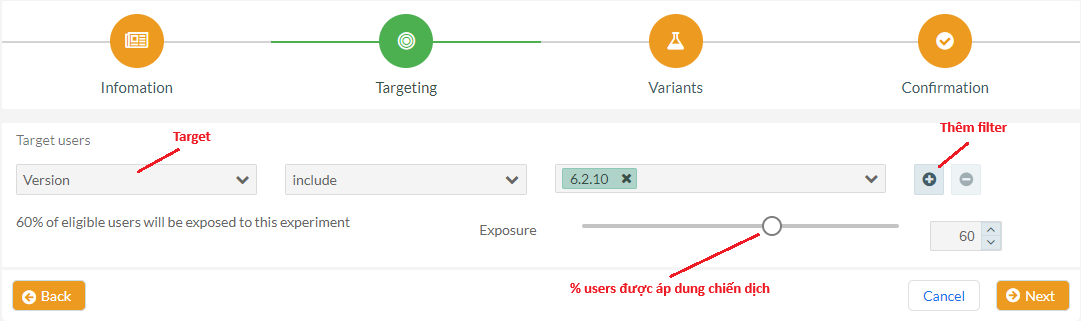
* Step 3: Create a Filter, then click Next.
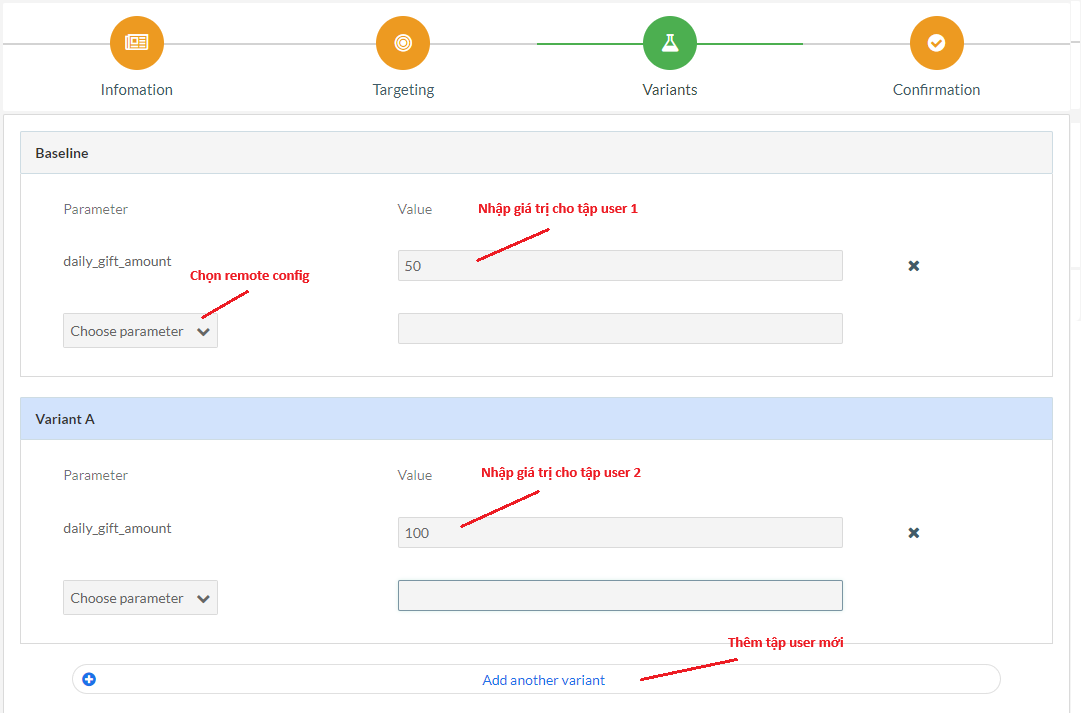
* Step 4.1: Configure for each user group.
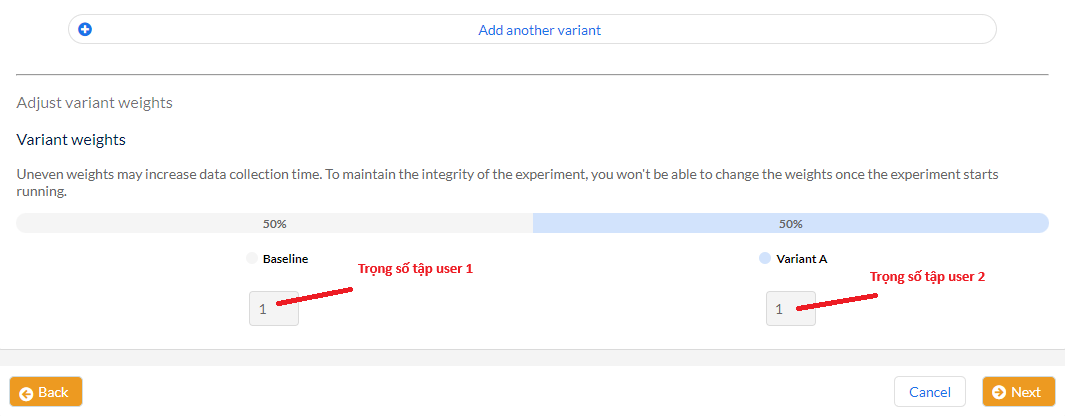
* Step 4.2: Change the weight for each user group, then click Next.
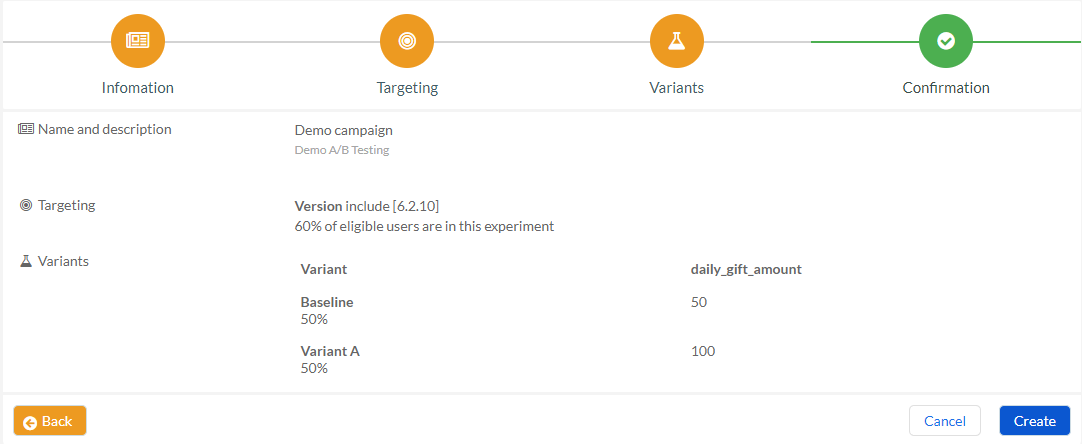
* Step 5: Review the information once more before clicking Create.
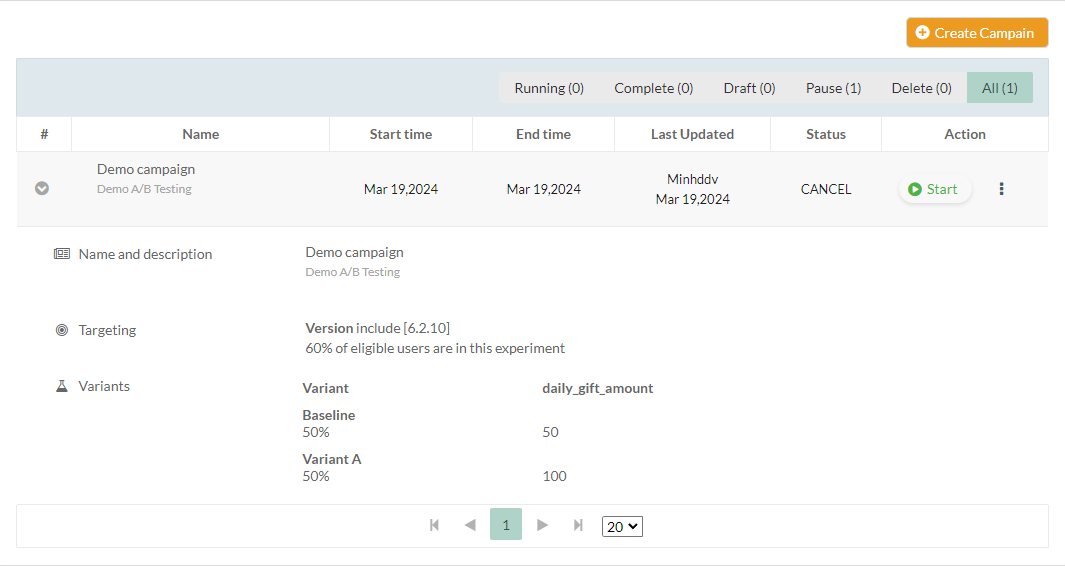
After completing the creation of the A/B Testing campaign, you must click Start to begin. Once you click Start, the value of the remote config variable will be pushed to the respective user groups.
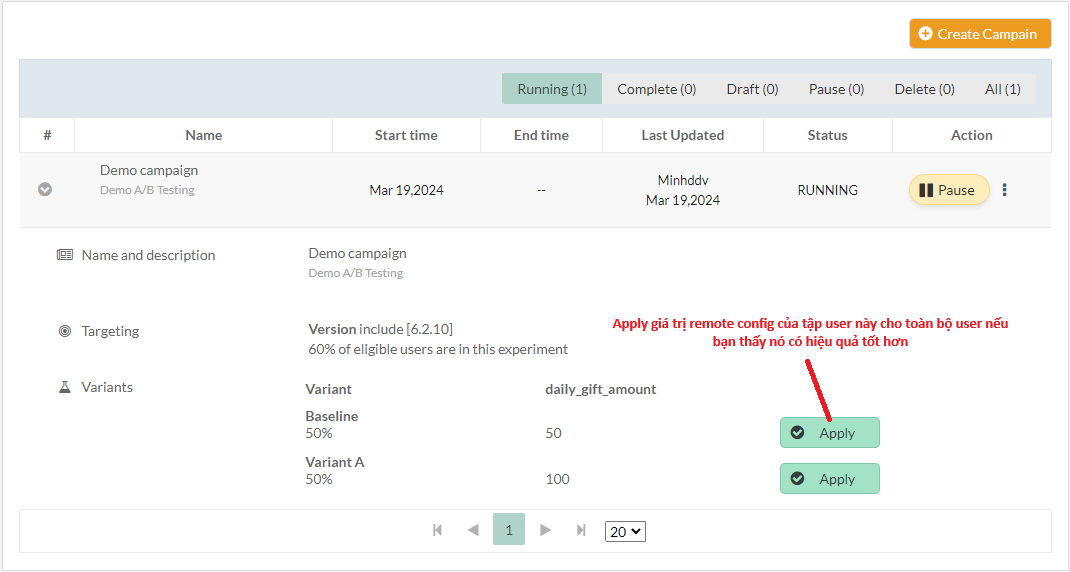
After a period of monitoring the data, you will be able to determine which user group finds your A/B Testing campaign more effective. At this point, you may want to apply the remote config value of that user group to all of your users. -> Choose Apply for the user group you want to do this with.